Basic Usage
The steps below show the process of queuing a build within the UBuild user interface.
Before following the steps below, ensure you have first created your own UBuild Project. (see more here)
UBuild will remain running when you "close" the main UI window so it can build in the background, you can shut down UBuild from your system tray, and you can right-click the UBuild icon.
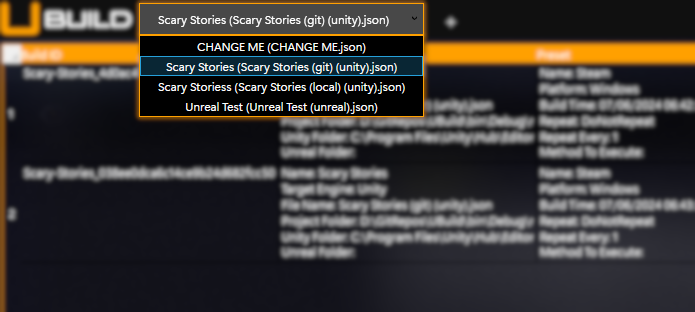
- Load a Project using the Project Selector.

- The Project Selector allows you to see what UBuild Projects are currently available.
- Changing the selection of the Project within the Project Selector will change the currently loaded Project within UBuild.
- Projects within the Project Selector will be formatted like so:
[ProjectName] ([ProjectFilename].json) - UBuild will automatically re-load Projects whenever changes to the files are saved.
- The Project Selector allows you to see what UBuild Projects are currently available.
- Select a Build Preset using the Preset Selector.
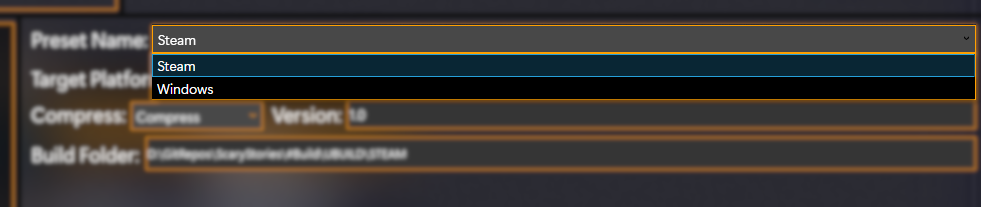
- The Preset Selector will be enabled when a Project is curently loaded.
- The Preset Selector will display Build Presets currently configured within the currently loaded Project.
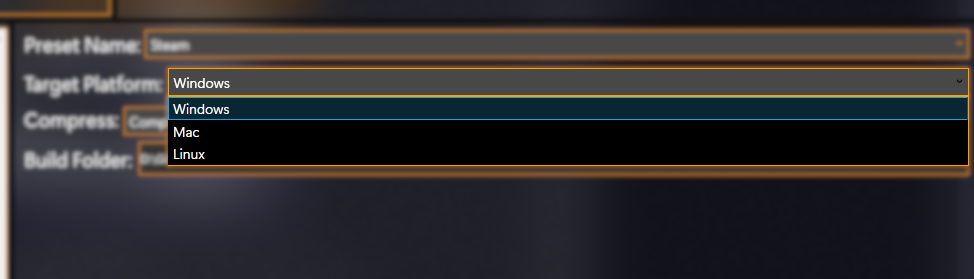
- Select a Supported Platform to target using the Platform Selector.

- The Platform Selector will be enabled when a Project is currently loaded
- The Project Selector will display Supported Platforms configured within the currently loaded Project.
- Ensure there is a Build Folder specified, if not click and select one.
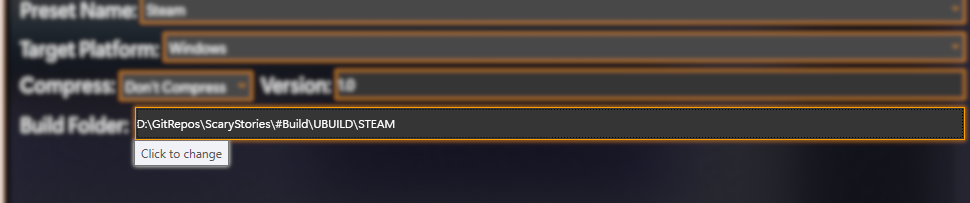
- This button will be enabled when a Build Preset has been selected.
- If this button does not display a file location then you must click, then set one.
- It is always best to check this field and ensure it is correct before adding a build to the queue.
- Add your build to the queue!
- This will add your configured build to the Build Queue, you will see it appear in the Build Queue panel within the user interface.