Getting started with UBuild
This is a guide to using UBuild, this book is recommended for those using UBuild for the first time.
Welcome to UBuild!
Thanks for checking out UBuild, I hope you find the tool useful!
This is a "How-to" guide on UBuild and it will cover everything you need to know before starting the tool, when using the tool, and even how to view reporting it after it's finished building.
This is a privately maintained project (as is its documentation) but if you would like to contribute to it or need any support at all please feel free to reach out here: devlin@publiczeus.com
Setup
First thing's first, let's get you setup!
Installation
Below you can find details on how to install UBuild.
Requirements
- Windows 10.0.17763.0+
- .NET 8.0 Runtime (Download Runtime from here)
Installation
Ensure the above requirements are met before installing. (Installing .NET may require a restart of your PC)
- Download the latest UBuild build from https://ubuild.publiczeus.com/download
- Extract the UBuild folder within the zip to wherever you would like the application to "live". (this is based on user preference)
First-time setup
Given that you have downloaded the UBuild tool to its own folder, follow the steps below to complete the "first-time setup" process.
- Run UBuild.exe
- As UBuild isn't yet a known application Windows may warn you that it has come from an "Unknown Publisher", so long as you have downloaded UBuild from a trusted source (ie: https://ubuild.publiczeus.com/download) you simply click "More info" > "Run anyways".
- As this is your first time running UBuild, the application will automatically create the necessary folder & files.
- You will now be presented with the license agreement, before continuing you must agree that you will not use UBuild for commercial purposes. (you'll only have to do this once) (read here for more about Commercial Licenses)
- Once you have agreed to the license, you're now able to start using UBuild!
From here it's recommended you Create your first Project. (see more here)
Creating your first Project
Here we will cover how to create your first Project within UBuild, although it is not required; some understanding of JSON formatting is recommended whenever editing Projects.
Create an empty Project
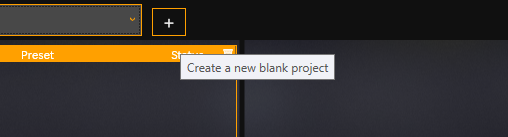
- To start we click the plus button to the right of our Project Selector, this will create a new, blank project for us to edit.

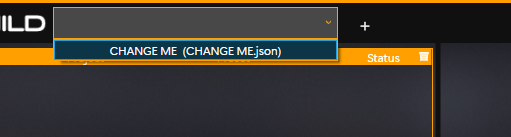
- Now there will be a "CHANGE ME (CHANGE ME.json)" Project within our Project Selector, select this to load it into UBuild.

Editing our empty Project
- Once the Project Selector displays "CHANGE ME (CHANGE ME.json)" as the loaded Project, right-click on the Project Selector and select "OPEN PROJECT CONFIG".

- This will open the project config file in whichever default application handles .json files, It is recommended that you use a lightweight text/code editor (like Notepad++).
- If the file fails to open in your editor of choice, in your File Explorer, right-click the file within the Projects folder, "Open with" > "Choose Another App" > "Always" on that text/code editor. Retry the step above and it should now open the project config in your text/code editor of choice.
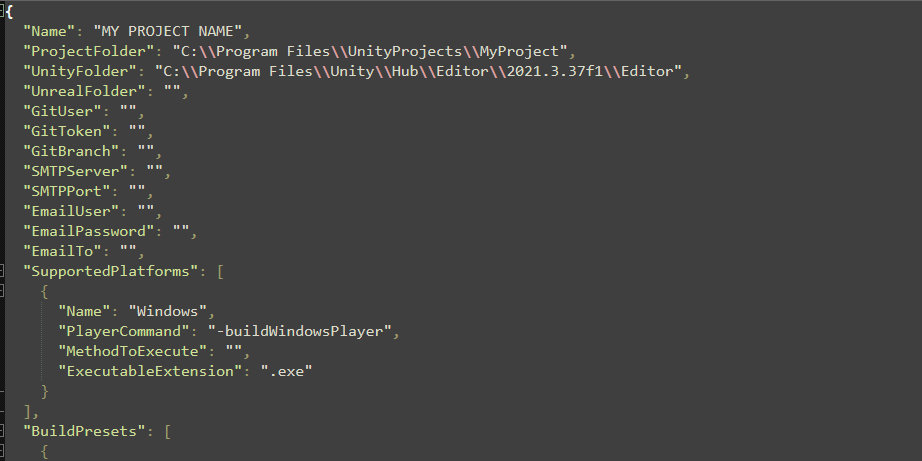
- Now, we must fill out some basic information about the Project we would like to build, the required fields are:

- Name - The name of your Project. This is how it will be displayed throughout UBuild. It will also use this as the final filename of the executable it builds.
- ProjectFolder - This is the path to your Unreal/Unity source project directory. (This can also be a Git URL, more info here)
- UnityFolder - This is the path to your Unity editor directory.
OR - UnrealFolder - This is the path to your Unreal editor directory.
- Make sure to save your changes! UBuild will automatically reload all its Projects when it detects a change.
- Be warned that reloading all Projects due to a file change will clear any temporary changes to the Preset within the UBuild user interface.
- Be warned that reloading all Projects due to a file change will clear any temporary changes to the Preset within the UBuild user interface.
- You can also rename the file itself from "CHANGE ME.json" to whatever we wish to call our Project.
- The file name does not need to be the same as the Project name, each Project file is an individual Project, and you may also create multiple Project files, for a single game project.
(ex: You can have a "MyGame (git).json" along with a "MyGame (local).json, both are the same Project but the configuration for each is slightly different)
- The file name does not need to be the same as the Project name, each Project file is an individual Project, and you may also create multiple Project files, for a single game project.

Basic Usage
The steps below show the process of queuing a build within the UBuild user interface.
Before following the steps below, ensure you have first created your own UBuild Project. (see more here)
UBuild will remain running when you "close" the main UI window so it can build in the background, you can shut down UBuild from your system tray, and you can right-click the UBuild icon.
- Load a Project using the Project Selector.

- The Project Selector allows you to see what UBuild Projects are currently available.
- Changing the selection of the Project within the Project Selector will change the currently loaded Project within UBuild.
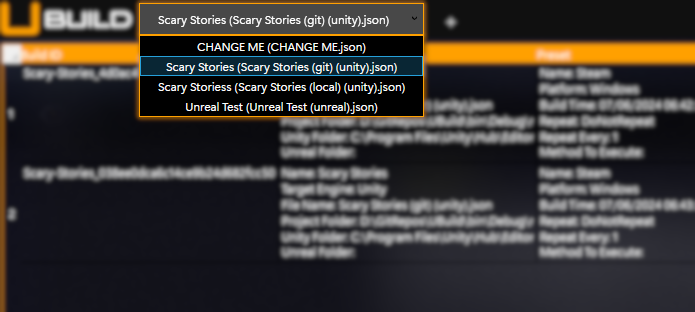
- Projects within the Project Selector will be formatted like so:
[ProjectName] ([ProjectFilename].json) - UBuild will automatically re-load Projects whenever changes to the files are saved.
- The Project Selector allows you to see what UBuild Projects are currently available.
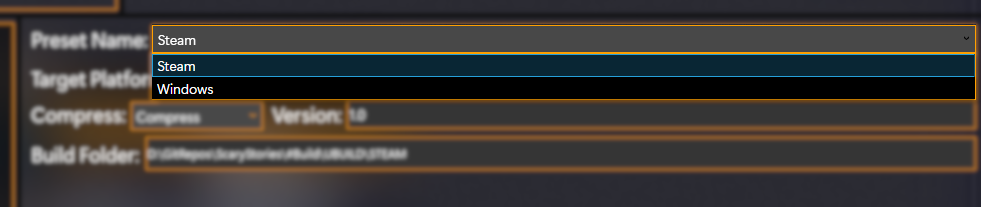
- Select a Build Preset using the Preset Selector.

- The Preset Selector will be enabled when a Project is curently loaded.
- The Preset Selector will display Build Presets currently configured within the currently loaded Project.
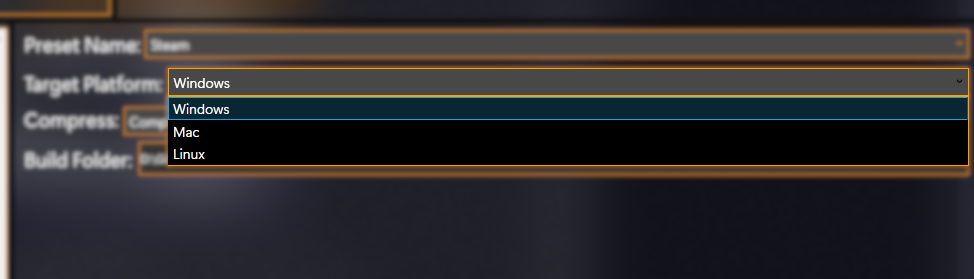
- Select a Supported Platform to target using the Platform Selector.

- The Platform Selector will be enabled when a Project is currently loaded
- The Project Selector will display Supported Platforms configured within the currently loaded Project.
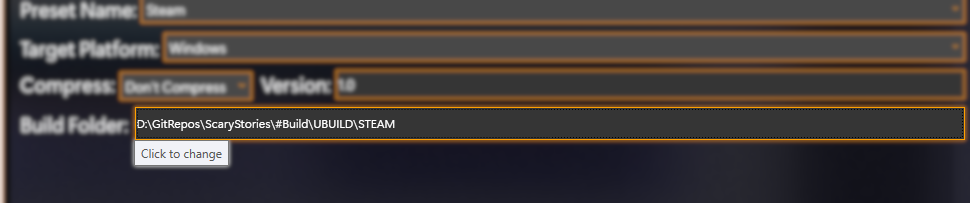
- Ensure there is a Build Folder specified, if not click and select one.

- This button will be enabled when a Build Preset has been selected.
- If this button does not display a file location then you must click, then set one.
- It is always best to check this field and ensure it is correct before adding a build to the queue.
- Add your build to the queue!
- This will add your configured build to the Build Queue, you will see it appear in the Build Queue panel within the user interface.
Projects
Creating, modifying and using Projects within UBuild.
Advanced Projects
Below are the more advanced configurations for UBuild Project.
Compression
UBuild can compress your builds to a single zip file. There are three options of compression:
- Don't Compress - This build will not be compressed.
- Compress - This build will be compressed.
- Compress & Clean - This build will be compressed, after which all files which have been compressed will be deleted. (leaving only the compressed file)
GitHub
UBuild can Fetch & Clone from Git, to achieve this follow the steps below:
- Within the Project configuration file, update the following:
- ProjectFolder: This is your Git repository's URL. (ie: the URL you would usually clone from)
- GitUser: This is the user you would like to authenticate as.
- GitToken: This is your legacy Git token that will be used during authentication.
- GitBranch: This should be the branch you wish to use.
- If all these details are correct UBuild can now clone the specified repository to the "/Git/" folder once you queue a build, after it has cloned, by default, it will now fetch before building to ensure the repository is up to date.
- Optionally, within your selected preset, you can set "ForcePullFreshProject" as "true" to ensure a fresh repository is created for each build. (this can be found within your Project configuration file)
Steam
UBuild can integrate directly with Steam to publish your build to Depots & branches. This system uses SteamPipe and a Steam developer account is required to use this feature.
It is recommended that you create a separate, UBuild-specific Steam account without mobile 2-factor authentication as you'll need to provide the UBuild with a valid Steam user with access to upload builds for your Steam App via SteamWorks. This information is only stored within your local Project configuration and is not shared.
To upload your builds to Steam:
- Within your Project configuration file, update the following:
- SteamAppID: This is your Steam AppID.
- SteamUsername: This is the Username of the user you would like to login with.
- SteamPassword: This is the password you would like to use.
- For each of your SupportedPlatforms you can specify which SteamDepotID to publish the build on.
- Within your BuildPreset you can also specify which SteamBranchName to publish your build on.
(Note: This uses SteamWorks "SetLive" which will automatically publish the changes to the branch available, this isn't allowed for your default branch. (read more))
FTP
UBuild can upload completed builds, neatly to an FTP site of your choice.
UBuild will also mention the path to this build in email notifications. (if enabled)
To configure FTP follow the steps below:
- Within the Project configuration file, update the following:
- FTPHost: This is the remote site you would like to upload to.
- FTPHost: This is the user with access to the above remote FTP site.
- FTPPassword: This is the password associated with your FTP user.
- Ensure that your selected Preset has "SendToFTP" as "true". (this can be found within your Project configuration file)
UBuild has support for email notifications of build success & failure.
In its most basic form, this will allow you to receive remote notification of complete builds, but if expanded upon, allows you the option of further automation after the build process has been completed such as Jenkins jobs, forwarding to QA teams, triggering Power Automate scripts etc.
Commercial License holders can skip step 1. If you wish, as a Commercial License holder you can use the UBuild Emailing Service.
To set up email notifications, please follow the steps below:
- Within the Project configuration file, update the following:
- SMTPServer: This is your SMTP email server address (usually something like "mail.mydomain.com")
- SMTPPort: This is the port at which your SMTP server is listening. (usually 587)
- EmailUser: This is the email address to login with.
- EmailPassword: This is the password associated with your EmailUser.
- Within the Project configuration file, update the following:
- EmailTo: This is the address to send emails to.
- Ensure that your selected Preset has "SendToEmail" as "true". (this can be found within your Project configuration file)
Supported Platforms
Supported Platforms allow you to specify which platform you're building to, this is usually an operating system but, can also be a console.
Editing Supported Platforms
By default, you should have a "Windows" Supported Platform within your Project. This is configured for Unity currently but we can change this by modifying the values below:
- Name: This is how the Platform should be displayed within UBuild. (this is also used to separate builds within the Presets build folder.)
- PlayerCommand: This is the command passed to either Unity Or Unreal to specify which platform to build this for. For Unity, this is referred to as a Build Player (see Build Arguments here). For Unreal, this is referred to as a Build Platform, for Windows this is "Win64" (Unreal forums got nuked so gl find sources for this 🥲)
- MethodToExecute: This is exclusively for Unity. This is the method to execute before building. (optional)
- ExecutableExtension: This is the executable extension for this platform. (ex: .exe/.so/.app/etc)
Build Presets
Build Preset allows you to easily save pre-configured builds for later, this saves you from having to re-set up settings each time you would usually switch platforms within the engine. This can be used for particular configurations of builds within the same platform (ex: Steam/Epic/Non-DRM/etc)
Editing Build Presets
You can edit build presets from within the Project configuration file, you can also "on-the-fly" edit some preset settings above the "ADD TO QUEUE" button.
Remember that any changes made to the build preset within the UI are temporary and will not affect the saved build preset within the Project configuration file but, will affect any builds added to the queue while those changes are present.
You can edit Build Preset by updating these values within the Project configuration file:
- Name: This is how your Build Preset should be displayed within UBuild. (this also is where to store builds within the build folder, containing folders for each Supported Platform)
- BuildFolder: This is the folder in which builds using this preset will be placed.
Advanced Build Presets
Below are some advanced methods of configuring Build Presets. These settings can be found within the Project configuration file.
Pre-build
These are pre-build, Build Preset settings:
- MethodToExecute: Exclusively for Unity. This will execute this method before building.
- AdditionalBuildArgs: These are additional arguments to pass into the builder. (either the UnityEditor or Unreal Automation Tool) (this is an array of strings)
Post-build
These are post-build, Build Preset settings:
- SteamBranchName: This is the name of the branch you would like to upload your build to.
- IncludeFilesFromFolder: This is a directory which UBuild will copy all files from to include in the final build.
- ExcludeFilesFromBuild: These are files that will be deleted from the final build.
- ExcludeFoldersFromBuild: These are files that will be deleted from the final build.
- DeleteBuildExceptZip: This will determine whether UBuild will clear the final build folder of all files except the compressed file. (this only applies if CompressToZip is true)
- CompressToZip: This will determine whether UBuild will compress the final build to a zip archive.
- SendToEmail: This will determine whether UBuild will send email notifications for this build.
- SendToFTP: This will determine whether UBuild will send this completed build to the FTP site.
- ForcePullFreshProject: This will determine whether UBuild will force a fresh clone from Git before building. (requires Git configuration, see more here)
App Configuration
How you can configure app specific settings.
User Configuration
The user configuration file stores user specific app state information. This information can vary in subject but will assist the app in retaining information the current users enters.
This is useful in preserving the applications current settings and personalisation (ex: where the app is, it's window size, etc)
API Configuration
This configuration file is used for storing information used by the UBuild API server.
Here you can specify where the API will listen along with changing the access token used when communicating with the API or where to use the access token at all.
Values
"url" - This is the host address for the API. This can either be "http://*:[PORT]" for forwarding to the internet or "http://localhost:[PORT]" for LAN/local access only. default: "http://localhost:5599")
"token" - This is a token required when sending an API request to UBuild. (default: randomly generated)
"require-token" - This indicates whether a token is required when sending API requests to UBuild. It's recommended if making the API publicly accessible, you change this to true. (default: false)
License Configuration
The license configuration file is used to store details about the current license.
This will contain either your personal/independent token agreement or your Commercial License Token and Password.
API
How to remotely interact with UBuild!
Basic Usage
Welcome to the UBuild API, a remote interaction service within the UBuild tool. This API allows you to interact with the UBuild application via API endpoints.
The UBuild API can be configured to work locally (within a LAN) or can be port-forwarded to be accessed from the internet. For security, by default, you must use an API key defined within the api.config. (see more about configuring the API here) (this can be disabled if only using UBuild within a LAN)
Included within each UBuild release is a Postman collection that you can import (documentation/UBuild.postman_collection.json), this collection will setup setup all UBuild endpoints within a UBuild Collection in Postman.
The UBuild API will automatically start when the application begins, so-long as the UBuild application is open- you will be able to use the API.
Retrieving Information
Using the UBuild API you can retrieve information using the HTTP GET method.
Methods
Below are the endpoints you can use to retrieve information from UBuild:
/queue
Get all the currently queued builds.
Accepts:
- Query/Params
- "token" - The user's access token. (optional; depending on api.config)
Returns:
- A JSON array of objects representing queued builds.
/report
Gets a build reporting matching the UID provided.
Accepts:
- Query/Params
- "token" - The user's access token. (optional; defined in api.config)
- "uid" - The UID of the build for which you want to receive a report.
Returns:
- A JSON object representing the build report.
/reports
Gets all currently stored build reports.
Accepts:
- Query/Params
- "token" - The user's access token. (optional; defined in api.config)
Returns:
- A JSON array of objects representing build reports.
Sending Information
You can send information to the UBuild API to add builds to the queue, cancel builds and if needed; you can even shut down UBuild.
Methods
Below are the endpoints you can use to retrieve information from UBuild:
/queue/add
Add a build to the queue.
Accepts:
- Query/Params
- "token" - The user's access token. (optional; depending on api.config)
- Body
- Basic Example:
{ "ProjectFilename": "Scary Stories (git)", "PresetName": "Steam", "PlatformName": "Windows" } - Advanced Example: (with Preset overrides)
{
    "ProjectFilename": "",
    "PresetName": "",
    "PlatformName": "",
    "ProjectOverrides": {
        "ProjectFolder": "",
        "GitUser": "",
        "GitToken": "",
        "GitBranch": "",
        "UnityFolder": ""
    },
    "PresetOverrides": {
        "MethodToExecute": "",
        "AdditionalBuildArgs": [],
        "BuildFolder": "",
        "IncludeFilesFromFolder": "",
        "ExcludeFilesFromBuild": [],
        "ExcludeFoldersFromBuild": [],
        "DeleteBuildExceptZip": false,
        "CompressToZip": false,
        "ForcePullFreshProject": false
    }
}
- Basic Example:
Returns:
- A plain-text message with the result of the operation. (200 = success)
/queue/cancel-current
This will cancel the currently in-progress build.
Accepts:
- Query/Params
- "token" - The user's access token. (optional; depending on api.config)
Returns:
- A plain-text message with the result of the operation. (200 = success)
/queue/cancel-all
This will cancel all builds within the queue.
Accepts:
- Query/Params
- "token" - The user's access token. (optional; depending on api.config)
Returns:
- A plain-text message with the result of the operation. (200 = success)
Logging
How and where UBuild logs things.
UBuild Logs
UBuild stores all application messaging in a logging file within the Logs folder. This file will be prefixed with "UBuildLog_" with the applications session launch time following.
This will display all information fond in the console displayed within the main window of the user interface. To avoid unnecessary logging within the UI some errors are reported to this log file instead of the UI console, in the event something is going wrong you should check this file and it will display more information.
Unity Logs
When building with Unity, all messaging is sent to a file within the Logs folder. This file will be prefixed with "UnityBuildLog_" and will be followed with the UID of the built sent to Unity.
Unreal Logs
When using Unreal, all logging messaging will be sent to a file within the Logs folder. These files will be prefixed with "UnrealBuildLog_" with the UID of the build sent to Unreal following.
Git Logs
There are two sources of Git logging for their respective operations, Clone and Fetch.
All messaging from Git is sent to a file within the Logs folder. Each file is prefixed with either "GitCloneLog_" or "GitFetchLog_" with the UID of the build associated with this operation.
The Git Fetch operation does not provide any logging if no changes where actually present. This may mean this file is often empty.
Reporting
UBuild creates build reports for every build it attempts to process. These UBuild Reports contain the status (success or failure), a summary of the report (success or reason for failure) and if available a few lines from the report from the game engine used for building.
Integrations
UBuild comes with some pre-made integrations with other apps like Unity & Postman.
Unity Package
There is a Unity Package provided with UBuild that you can import directly into your project.
This package uses the UBuild API to remotely modify builds, add them to the queue and get real-time information from the UBuild app.
You can simply import the provided .unitypackage file into Unity and you will be able to remotely access UBuild from Unity!
Be sure to check "UBuild/UBuildVariables.cs" as you can change the access token and UBuild API endpoint here.
Getting information
You can retrieve information from this package by using the "UBuild" menu item at the top of Unity.
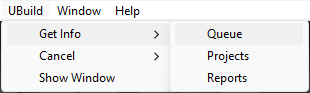
Here you can check:
- Currently queued builds: This will print each queued build into the Unity Editor console,
- Projects currently loaded: This will print each Project currently loaded in UBuild into the Unity Editor console.
- UBuild Reports: This will print each UBuild Report currently stored into the Unity Editor console.
Sending information
You can send information to UBuild either by using the "UBuild" menu item at the top of Unity or by using the UBuild window.
Cancel menu
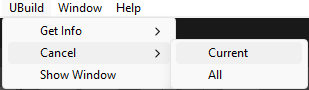
Here you can send a:
- Request to cancel the current build.
- Request to cancel all queued builds.
UBuild Window
|
|
|
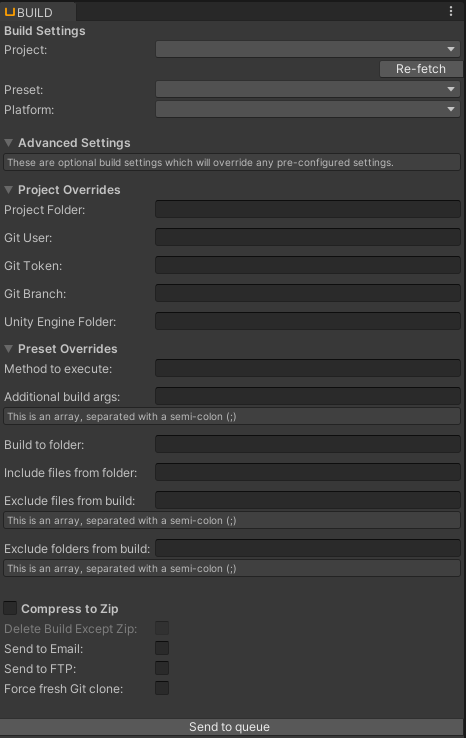 |
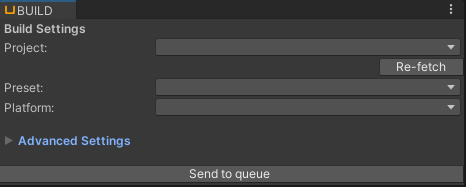
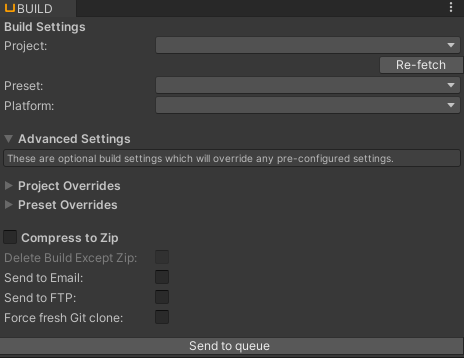
Here you can:
- Send a build to the queue.
- Remotely view all currently loaded projects/presets/platforms in the dropdowns.
- Chance advanced settings like FTP upload, Email notification etc "on the fly".
- Set advanced build overrides before sending a build to the queue.
Postman collection
Provided with UBuild is a basic postman collection including all the available UBuild API methods. (you can read more about the API here)